Planning a home renovation in Poland can feel like juggling a dozen tasks at once. Permits, contractors, budgets, timelines, material orders, and final inspections all demand your attention simultaneously. Without a clear roadmap, even a modest bathroom update can spiral into weeks of delays and unexpected costs. This guide gives you a practical, step-by-step checklist built specifically for Polish homeowners. From the first permit check to the final walkthrough before payment, you'll know exactly what to do, when to do it, and how to protect yourself from the most common renovation pitfalls.
Table of Contents
- What to know before you start: Permits, budgets, and planning essentials
- Choosing reliable contractors: How to avoid costly mistakes
- The step-by-step renovation checklist every Polish homeowner needs
- Final inspections and handover: How to verify quality before you pay
- Expert insight: What most homeowners overlook (and why it matters)
- Ready to renovate? Take the next step
- Frequently asked questions
Key Takeaways
| Point | Details |
|---|---|
| Plan permits first | Start your renovation by clarifying which works require a permit or notification to avoid costly fines. |
| Budget with a buffer | Include a 10–20% contingency in your cost plan to handle unexpected issues or price changes. |
| Vet your contractors | Check licenses, references, and insurance before hiring to prevent poor workmanship or fraud. |
| Follow the checklist | Stick to the chronological renovation steps to minimize delays and ensure professional results. |
| Inspect before you pay | Always perform a project walkthrough and confirm repairs before making final payments to contractors. |
What to know before you start: Permits, budgets, and planning essentials
Before diving into construction, let's establish the groundwork every homeowner must address. Getting this stage right saves you from legal trouble, budget shocks, and frustrating delays later.
Permits and notifications in Poland
Not every renovation requires a permit, but knowing the rules is critical. According to Polish law, cosmetic works like painting or replacing flooring need no permit or notification at all. However, noisy works and gruz (rubble) removal typically require notifying your spółdzielnia (housing cooperative) or local community. Window replacements, changes to installations, and similar works require a formal report with a 21-day waiting period. Structural changes to load-bearing walls or gas system modifications require a full building permit.
Ignoring these rules can result in fines reaching up to 50,000 PLN, plus the cost of reversing unauthorized changes. Always check permit requirements before swinging a single hammer.
Quick permit reference:
| Work type | Required action |
|---|---|
| Painting, flooring | No action needed |
| Noisy works, gruz removal | Notify spółdzielnia |
| Window replacement, installations | Report (21-day wait) |
| Load-bearing walls, gas systems | Full building permit |
Pro Tip: If you live in a historic building, the rules are even stricter. Always consult a local architect or your local building authority (Urząd Budowlany) before starting any structural work.
Budgeting and contingency planning
A standard 50m² apartment renovation typically takes 4 to 8 weeks and costs vary significantly depending on the city and scope of work. In Warsaw, labor alone can run from 500 PLN per square meter upward. Always add a 10 to 20% contingency buffer to your total budget for surprises like hidden water damage or outdated wiring.
For older buildings, the situation is more demanding. Older buildings require a 20 to 25% higher contingency fund because hidden problems are far more common. If your budget is tight, consider a phased renovation approach, tackling one room at a time. Whatever approach you choose, document everything with photos and written protocols from day one.
"Failing to budget for surprises is the single most common reason Polish renovation projects run over time and over cost. A 15% contingency is not optional, it's essential."
Choosing reliable contractors: How to avoid costly mistakes
With the legal and financial basics handled, your next critical task is selecting the right renovation professionals. This step can make or break your entire project.
What to check before hiring anyone
Checking references, portfolio, and licenses is non-negotiable. For electrical work, look for SEP certification. For gas work, verify the appropriate gas installation license. Always confirm the contractor carries OC (liability insurance), which protects you if something goes wrong on-site.
Here is a clear list of what to verify before signing anything:
- Portfolio and references: Ask for photos of completed projects and contact at least two previous clients directly.
- Business registration: Verify the company in CEIDG (for sole traders) or KRS (for companies). This takes five minutes online and confirms the business is legitimate.
- Licenses: Confirm trade-specific licenses, such as SEP for electricians.
- Insurance: Request a copy of the OC policy. No insurance, no deal.
- Written contract: Every scope of work, timeline, and payment milestone must be in writing.
Get at least three quotes
Comparing at least 3 quotes is one of the most effective ways to protect your budget and spot red flags. A quote that is dramatically lower than the others often signals hidden costs, poor materials, or a contractor who plans to cut corners. A quote that is unusually high does not automatically mean better quality. Use the middle ground as your baseline and ask each contractor to break down labor (robocizna) and materials (materiały) separately.
Contractor vetting checklist:
| Step | What to check | Why it matters |
|---|---|---|
| Business register | CEIDG or KRS listing | Confirms legal operation |
| Licenses | SEP, gas, structural certs | Ensures qualified work |
| Insurance | OC policy copy | Covers damage liability |
| References | Two or more past clients | Validates real-world quality |
| Contract | Written scope and milestones | Legal protection for both sides |
Pro Tip: Never pay the full amount upfront. A standard payment structure is 30% at the start, 40% at mid-project inspection, and 30% upon final sign-off. This keeps the contractor motivated and protects you financially if problems arise.
"The cheapest offer is rarely the best value. Always ask what is included in the price, because the details are where the real costs hide."
The step-by-step renovation checklist every Polish homeowner needs
After securing your contractor, it is time to map out the renovation process step by step. Knowing the sequence prevents costly rework and keeps your project on track.
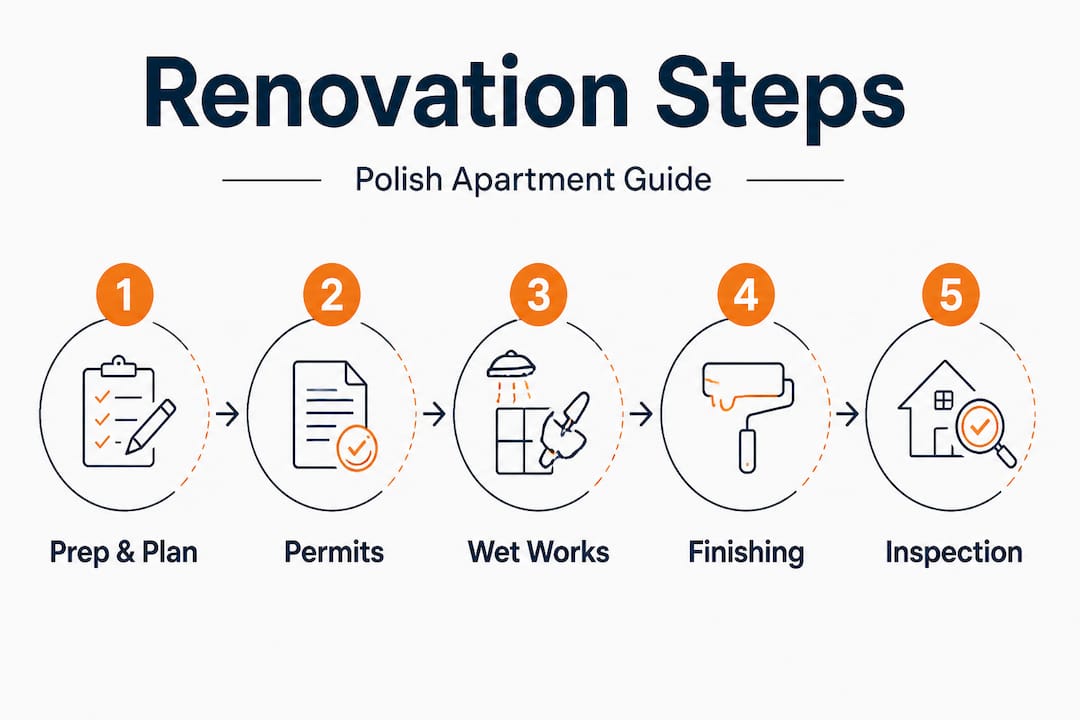
The standard renovation sequence
The standard sequence of renovation works in Poland follows a logical order that minimizes rework and protects finishes:
- Demolition (2 to 5 days): Remove old tiles, plaster, fixtures, and any structural elements that need replacing.
- Rough works (3 to 7 days): Repair walls, ceilings, and floors at the structural level.
- Installations (5 to 10 days): Run new electrical, plumbing, and heating lines before walls are closed.
- Waterproofing (2 to 4 days): Apply waterproof membranes in bathrooms and kitchens.
- Flooring substrate (3 to 5 days): Pour or level floor screeds and allow adequate drying time.
- Tiling (7 to 15 days): Install wall and floor tiles, including grouting and sealing.
- Wall finishing and plastering (5 to 10 days): Apply plaster, skim coats, and primer.
- Carpentry and doors (3 to 7 days): Fit door frames, interior doors, and built-in elements.
- Painting (4 to 8 days): Apply finish coats after all dust-generating work is complete.
- Final fixtures (2 to 5 days): Install light fittings, switches, sockets, bathroom fixtures, and kitchen appliances.
Most home renovation steps for a standard apartment take between 30 and 60 days in total. Complex projects or older buildings can stretch to 16 weeks.
Renovation approach comparison
| Approach | Typical duration | Best for |
|---|---|---|
| Standard | 4 to 8 weeks | Most 50m² apartments |
| Fast-track | 2 to 4 weeks | Minor updates, single rooms |
| Phased | 3 to 12 months | Limited budgets, occupied flats |
According to renovation planning experts, wet works must come first due to drying times. Skipping this rule is one of the most common and expensive mistakes. If you tile before the screed is fully dry, tiles crack. If you paint before plaster cures, paint peels. Patience at each stage protects your investment.
Pro Tip: Order doors, windows, and custom carpentry items as early as possible. Lead times for quality products in Poland can run 4 to 8 weeks. Ordering late is one of the top reasons projects stall at the finish line. Review your project timeline details carefully and factor in delivery windows from day one.
Key statistic: Most standard apartment renovations in Poland take between 30 and 60 working days. Factor in weekends, material deliveries, and drying times when setting your move-in date.
Final inspections and handover: How to verify quality before you pay
Once workers signal completion, the last important step is making sure everything meets your standards before handing over payment. This stage is where many homeowners relax too early and end up paying for problems they should have caught.
Your final walkthrough checklist
Work through this list room by room before signing anything:
- Plumbing test: Run all taps, flush toilets, and check under sinks for leaks. Even a slow drip signals a problem.
- Electrical test: Test every switch, socket, and light fitting. Bring a phone charger to check each socket individually.
- Tile alignment: Check for lippage (uneven tile edges), cracked grout, and hollow tiles. Tap each tile lightly; a hollow sound means poor adhesion.
- Floor levelness: Use a spirit level on screeds and tiled floors. Slopes toward drains in wet rooms are intentional; slopes elsewhere are not.
- Door and window operation: Open and close every door and window. They should move smoothly without catching or rattling.
- Paint finish: Look for drips, missed patches, and uneven coverage under natural light.
- Silicone and sealant joints: Check all joints around baths, showers, and sinks. Gaps or cracking invite water damage.
- Ventilation: Confirm that ventilation grilles are installed and unobstructed.
The final inspection should cover leaks, evenness, doors and drawers, lights and switches, and full plumbing and electrical testing. Document every fault with dated photos and a written snag list. Hand this list to your contractor and set a clear deadline for repairs.
"Never skip the final walkthrough. A 30-minute inspection can save you thousands of PLN in repairs you would otherwise pay for yourself."
Pro Tip: Withhold the final payment installment until every item on the snag list is resolved and both parties have signed a completion protocol (protokół odbioru robót). This document is your legal proof that work was completed to an agreed standard.
Expert insight: What most homeowners overlook (and why it matters)
Even with a solid checklist, surprising issues can derail projects. Here is what Polish renovation experts wish more homeowners knew before they started.
The most overlooked risk is under-budgeting for older buildings. Older buildings need a 20 to 25% higher contingency because problems like rotting joists, outdated knob-and-tube wiring, or crumbling plaster only reveal themselves once demolition begins. No contractor can price what they cannot see. If you are renovating a pre-1980s building, treat every budget estimate as a starting point, not a ceiling.
The second overlooked risk is chasing the lowest quote. We see this pattern repeatedly. A homeowner selects the cheapest contractor, work begins, quality problems emerge, and the contractor either disappears or demands extra payment to fix issues they caused. The cost of hiring a second crew to correct poor work almost always exceeds what the homeowner saved by choosing the lowest bid in the first place.
Documentation is your best protection. Take photos of every wall before it is plastered, every pipe before it is buried, and every electrical cable before it is covered. If a dispute arises months later about hidden work quality, photos with timestamps are far more persuasive than verbal arguments. Written protocols at each project stage serve the same function. They create a clear record that protects both you and the contractor.
Finally, if you discover a hidden problem mid-project, do not panic and do not ignore it. Stop work on that element, document the finding with photos, and request a written change order from your contractor before authorizing any additional work. This prevents scope creep and ensures you are not paying for undisclosed extras at the end.
Ready to renovate? Take the next step
You now have a clear, practical roadmap for your renovation. The next step is putting it into action with professionals you can actually trust.

At justRenovate.it, we make it straightforward to find trusted renovation crews who are pre-screened and rated. Our platform uses an auction model where verified companies with a minimum Google rating of 4.0 compete for your project, submitting detailed quotes that break down both labor and materials. You compare prices, reviews, and experience side by side. Everything is free for homeowners, and contractors only pay a commission after you confirm satisfaction. Ready to move from planning to action? Post a renovation project today and receive competitive quotes from vetted professionals. Explore the justRenovate.it platform and see how simple finding the right team can be.
Frequently asked questions
Which home renovations in Poland require permits?
Permits are required for structural changes like load-bearing walls and gas system modifications, but cosmetic updates such as painting or replacing flooring need no permit or notification.
How much should I budget for a standard apartment renovation in Poland?
Plan for at least 500 PLN per square meter for labor in Warsaw, and always add a 10 to 20% contingency buffer on top of your total estimated cost.
What's the average duration for a full home renovation?
A standard 50m² renovation takes 4 to 8 weeks; full renovations covering all rooms can stretch to 8 to 16 weeks depending on scope and building condition.
How can I check if a contractor is licensed and insured in Poland?
Check licenses and references such as SEP for electricians, request a copy of their OC insurance policy, and verify their business registration in the public CEIDG or KRS registers.
Is it safe to DIY parts of my renovation?
DIY is safe for cosmetic tasks like painting or assembling furniture, but plumbing, electrical work, and anything structural should always be handled by licensed professionals.